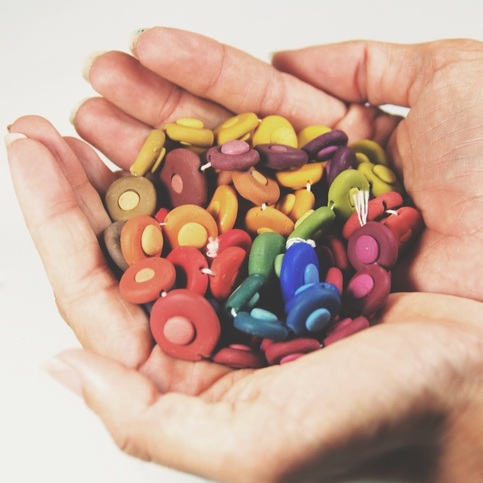
Here is my little secret to create beautiful and vibrant new colors and I want to share it with you.
You can buy polymer clay in many beautiful colors, but I prefer to buy big quantities of basic colors, black and white, and then to mix them to create my very own palette.
You can buy polymer clay in many beautiful colors, but I prefer to buy big quantities of basic colors, black and white, and then to mix them to create my very own palette.
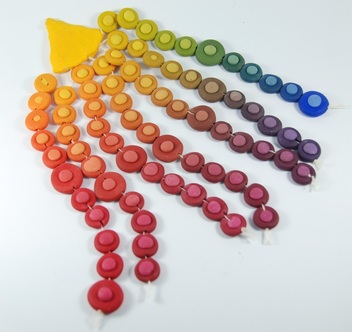
Creating a phisycal palette helps you in many ways:
- Since your real polymer clay colors can only be close to the basic ones, but never completely pure, this palette allows you to see what are the real colors you can create staring from your basic colors.
- It will give you an inspirations about your next creations: creating colors combinations is live playing on a piano: you need to know what goes well toghether. With this pulp color palette, you know that putting together colors that are in the same line, is like playing a chord in the same scale. It just works well,
- Moreover, it is a beautiful object to put some color in your studio!
Lets get started then!
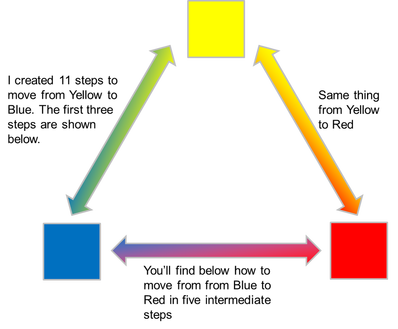
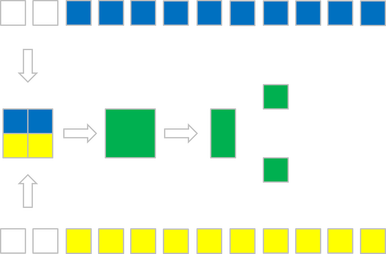
Basically, what we have to do is moving, using a different number of tessels from one color to another.
In this tutorial, we'll move from yellow to blue to red. I repeat myself: I am talking about your real yellow and red and blue basic polymer clay colors.
Basically, what we have to do is moving, using a different number of tessels from one color to another.
In this tutorial, we'll move from yellow to blue to red. I repeat myself: I am talking about your real yellow and red and blue basic polymer clay colors.
To move from blue to red, you can follow the proportions in the picture on the left.
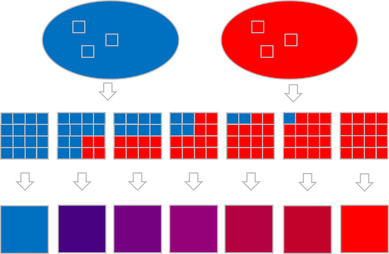
The best way to make a sheet of blue polymer clay with your pasta machine thickest setting and then to cut many shapes of the same dimension with a cutter. I used small squares but you can do it with small circles or anything else.
You don't need to use so much clay.
Let's say every small square has a side of 2 cm.
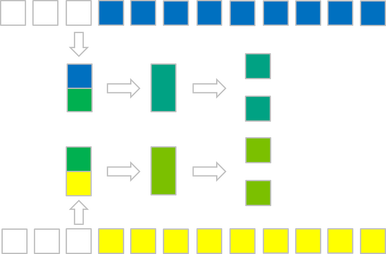
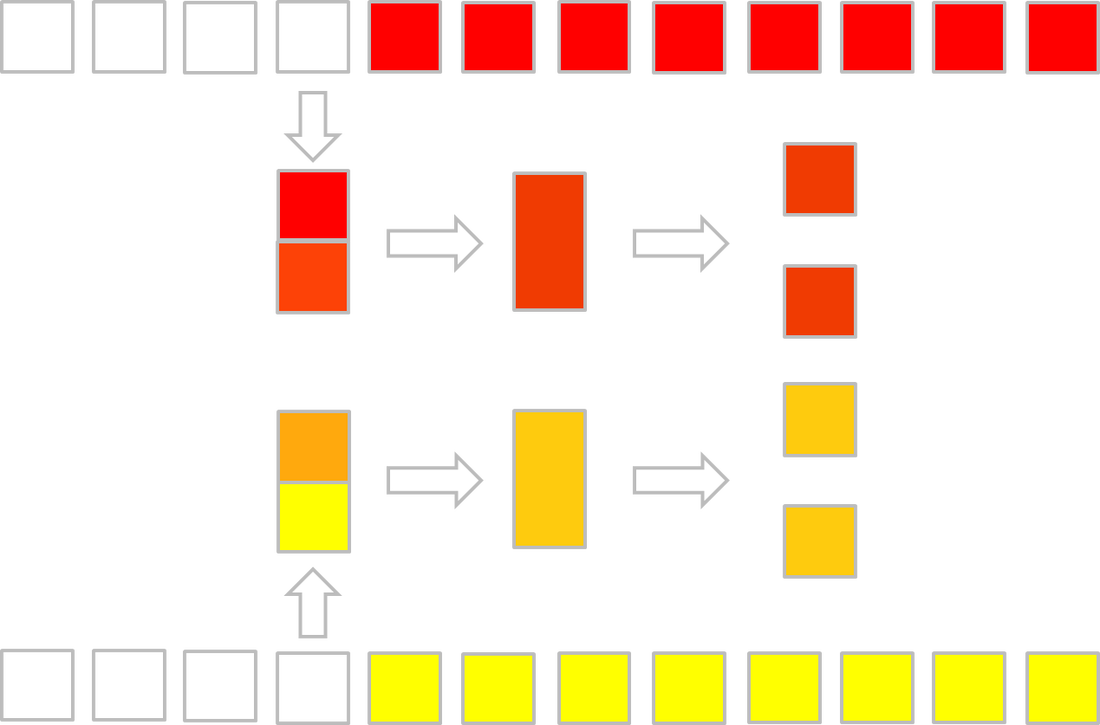
Now we are going to see how to create the tessels from ranch of the seven colors above to the yellow.
We' ll make just to examples (from blue and from red), but you will have to do it from each of the seven colors.
We' ll make just to examples (from blue and from red), but you will have to do it from each of the seven colors.
From blue:
Make a sheet of polymer clay starting from the blue color using the thickest setting of your pasta machine.
Then cut 12 squares of 2 cm side.
Do the same with yellow.
Mix together two squares of blue and two squares of yellow.
From the green clay you get, cut four squares.
Mix two of them together: this will be the central bigger tessel of your blue to yellow line.
Keep the to her two separated: you will need it for the next step.
Second step:
Mix one of the two green square with a blue one and the other one with a yellow square.
Using the same cutter as before, cut two 2cm squares from the new colors obtained.
Starting from the first set of two squares (the bluish ones), you will use one square to create the first tessel between the center green and the blue one. And you will use the second one to mix it with another blue square.
Starting from the second set of two squares (the yellowish ones), you will use one square to create the first tessel between the center green and the yellow one. And you will use the second one to mix it with another blue square.
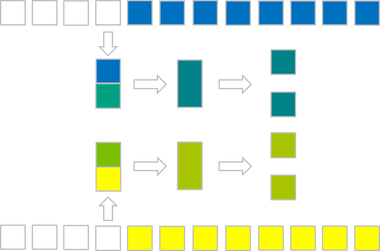
Go on with the third step exactly in the same way.
In each step you'll obtain one tessell that is closer to yellow and One that is closer to blue. and two more squares to mix in the next steps.
When you finish to the blue line, move to the red one (example below) and then to all of the seven lines
In each step you'll obtain one tessell that is closer to yellow and One that is closer to blue. and two more squares to mix in the next steps.
When you finish to the blue line, move to the red one (example below) and then to all of the seven lines
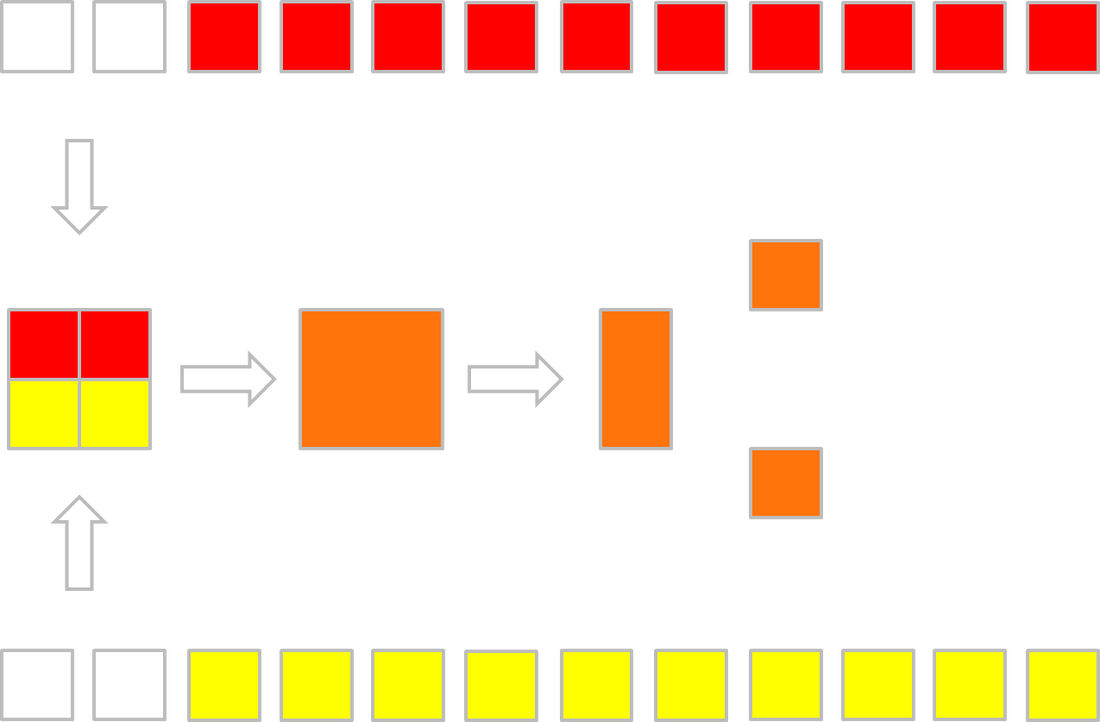

Great! You did most of the job! In the next part of the tutorial, I'll teach you how to put it all together.
Stay tuned!
Stay tuned!
 RSS Feed